Learning how to press a wedding bouquet is pretty simple when you follow the right steps. In this post, I am going to go over the do’s and don’ts of preserving your wedding bouquet because I almost ruined mine!
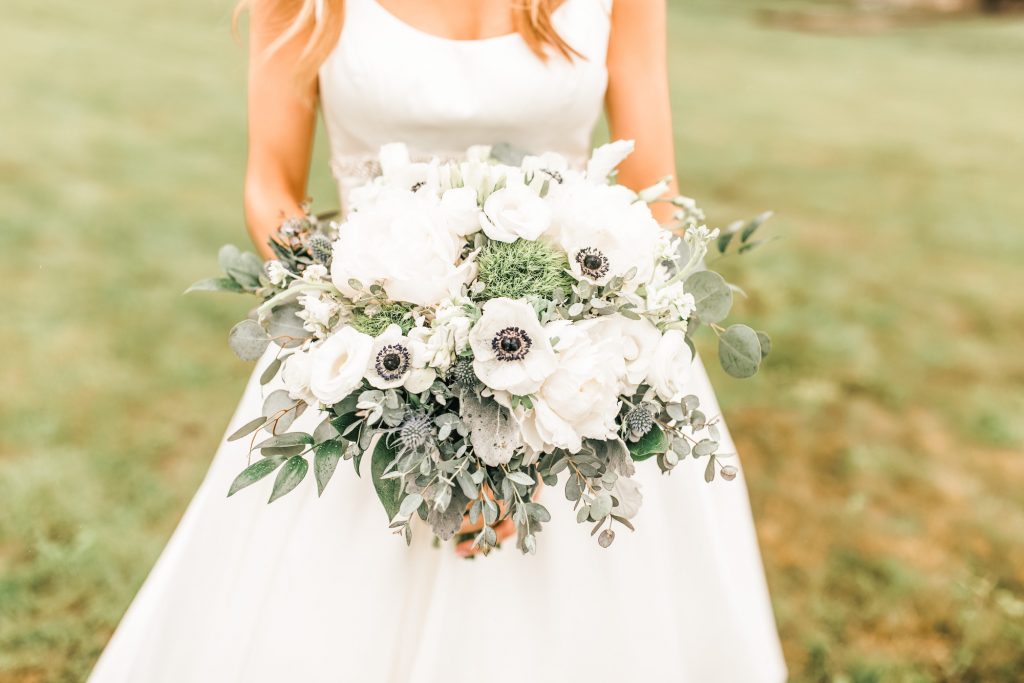
The one thing I wanted to save after our wedding was my bouquet. I saw different flowers and bouquets pressed in frames, and it just seemed like the perfect idea to me. You have a beautiful piece of art to hang on your wall with such a meaningful story behind it with great memories.
The morning after our wedding, we went to pick items up from the venue, including the florals. Well, every bridesmaid’s bouquet was there, but mine was of course missing. No idea what happened to it. Needless to say, I was pretty upset. A big bummer.
In my head I figured I could just use my sisters’ bouquets, since theirs’ had the same flowers as mine, just smaller versions. However, there was some miscommunication and I ended up with no florals…
Our 1 year anniversary rolled around, and my husband gifted me the exact same bouquet I had at our wedding. I was very thankful (still am), and although it isn’t my actual wedding bouquet, it is still meaningful and special.
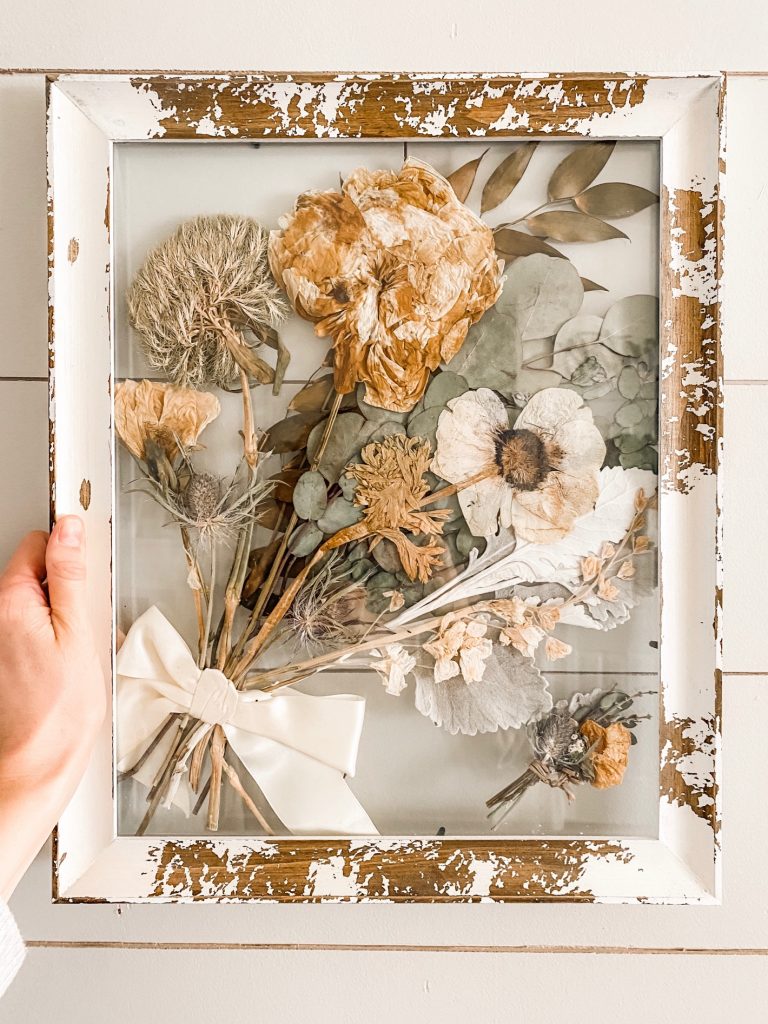
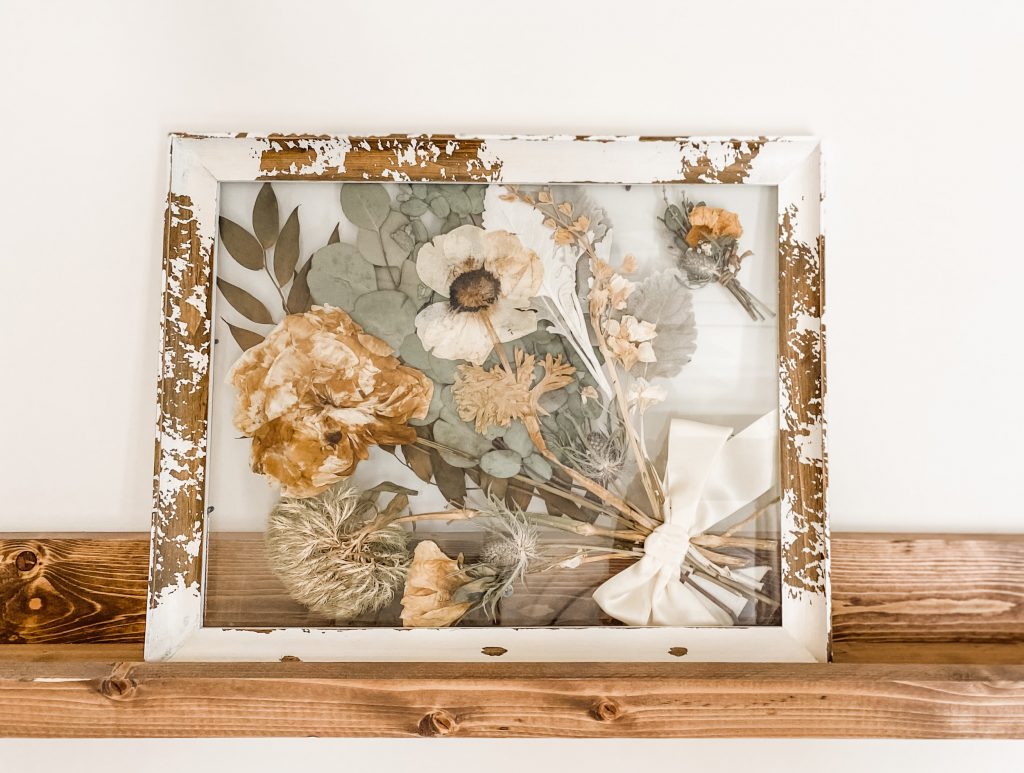
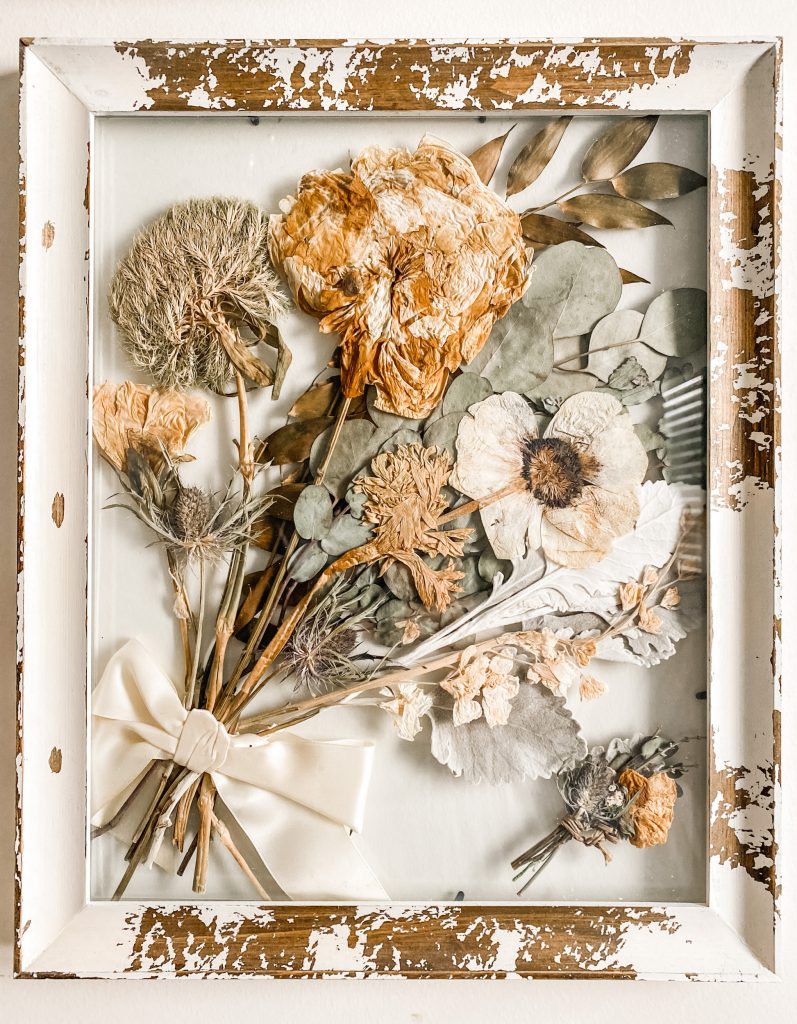
PRESSING MY WEDDING BOUQUET
The bouquet was pretty large, as you can see in the photo. I knew I didn’t need that many flowers, but luckily I had that many because I learned what not do when pressing flowers. 🙂
I first didn’t give my flowers anything to soak up their moisture. When I checked them the first time, I had some sticking to the surface, and noticed some black dots…mold! I panicked. I had to throw away a handful of flowers. This was already my 2nd bouquet, so I knew I had to be careful with this one.
When I thought about it, I wanted to clock myself in the head. I felt like it was such a silly mistake, but I learned from that no doubt.
In the end, I still had more than I needed, and am able to see the memories of our wedding every day in our bedroom.
TIPS OF FLOWER PRESSING
The fresher the flowers, the easier they will be to mold into the position you want them. You don’t want them getting dry before they are pressed.
Make sure you have some sort of paper to soak of the moisture – Do not press your flowers against 2 surfaces that will not soak in moisture. This can cause mold, and nobody wants that.
Use heavy objects to press flowers. You can definitely use books, but beware that because the papers will soak some moisture, your pages will most likely warp. Also, be cautious of text ink leaking onto the flowers. This did not happen to me, but is possible.
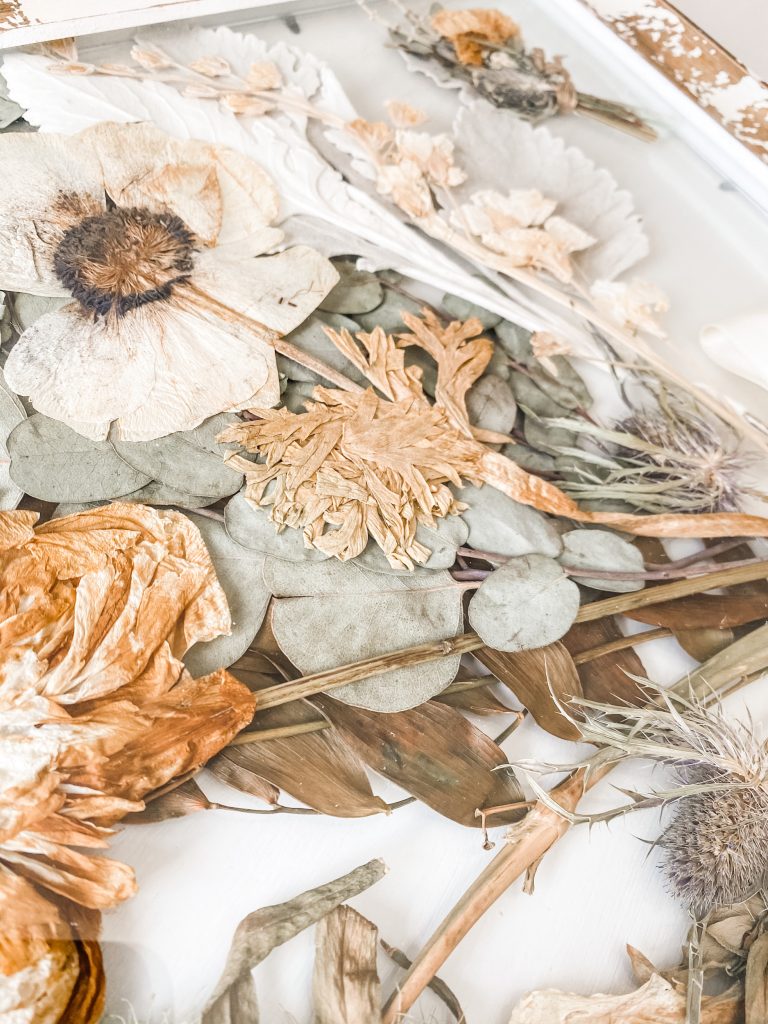
Do not layer flowers/greens on top of each other. Spread them out. This will help get them as flat as possible, and again, soak up all the moisture.
WHAT YOU NEED TO PRESS & FRAME YOUR WEDDING BOUQUET
- Wedding bouquet
- Paper
- Heavy objects (books, bricks, etc)
- See-thru frame
HOW TO PRESS & FRAME YOUR WEDDING BOUQUET
First, pre-lay your flowers and greenery how you want them in your frame. This will ensure they are pressed dry the way you want.
Take each piece and lay it on a piece of paper, which should be on a hard surface.
Fold stems, pedals, and leaves as desired.
Top with another piece of paper (or close or your book), and top again with a heavy item.
Check your florals periodically to make sure they are drying properly, and no issues are arising. (aka no mold)
Make sure your florals are COMPLETELY dry before moving them to the frame. This may take a few days.
Once dried, organize your florals onto your frame and add a bow or other accessory if desired.
Note that the more layering you do, the thicker your frame will be, and it may note fully close. You can always break/cut stems to make them appear to layer if it is too thick.
Finally, close up your frame, and admire for years to come! 🙂
HOW TO PRESS YOUR WEDDING BOUQUET

Materials
- Wedding Bouquet
- Paper
- Heavy Object (books, bricks, etc)
- See-Thru Frame
- Ribbon (Optional)
Tools
- Scissors (Optional)
Instructions
First, pre-lay your flowers and greenery how you want them in your frame. This will ensure they are pressed dry the way you want.
Take each piece and lay it on a piece of paper, which should be on a hard surface.
Fold stems, pedals, and leaves as desired.
Top with another piece of paper (or close or your book), and top again with a heavy item.
Check your florals periodically to make sure they are drying properly, and no issues are arising. (aka no mold)
Make sure your florals are COMPLETELY dry before moving them to the frame. This may take a few days.
Once dried, organize your florals onto your frame and add a bow or other accessory if desired.
Note that the more layering you do, the thicker your frame will be, and it may note fully close. You can always break/cut stems to make them appear to layer if it is too thick.
Finally, close up your frame, and admire for years to come!
Notes
The fresher the flowers, the easier they will be to mold into the position you want them. You don’t want them getting dry before they are pressed.
Make sure flowers and greenery are COMPLETELY dry before moving to the frame.
Note that the more layering you do, the thicker your frame will be, and it may note fully close. You can always break/cut stems to make them appear to layer if it is too thick.
PIN IT FOR LATER

CHECK OUT MY PREVIOUS POST
Check out another post from the blog here -> How To Paint a Grandfather Clock
How do I avoid mold ?
Make sure your florals are completely dried out before placing them in the frame. They should be pretty crisp. Placing them between paper or in a book will help draw out moisture. You can even place them in the sun after they are already flattened to ensure they dry out completely.
Hi, so excited to try this! Where did you get your frame from?
Hi Caitlyn, sorry I missed your comment! I ended up getting this frame from Hobby Lobby 🙂