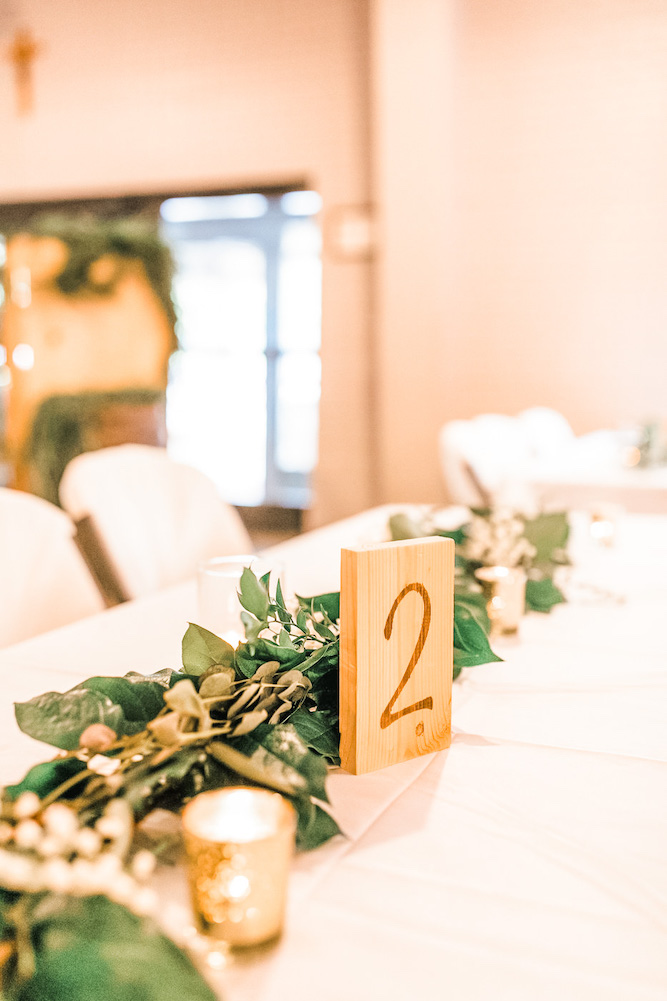
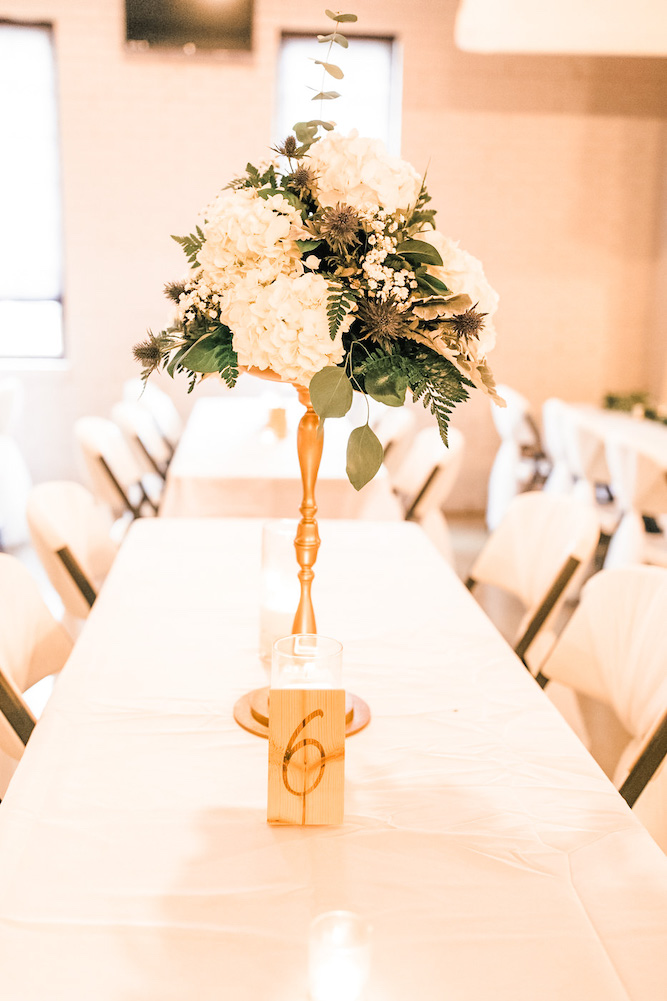
Learn how to make easy wood table numbers in this post. Wooden table numbers are a perfect element to compliment a natural centerpiece.
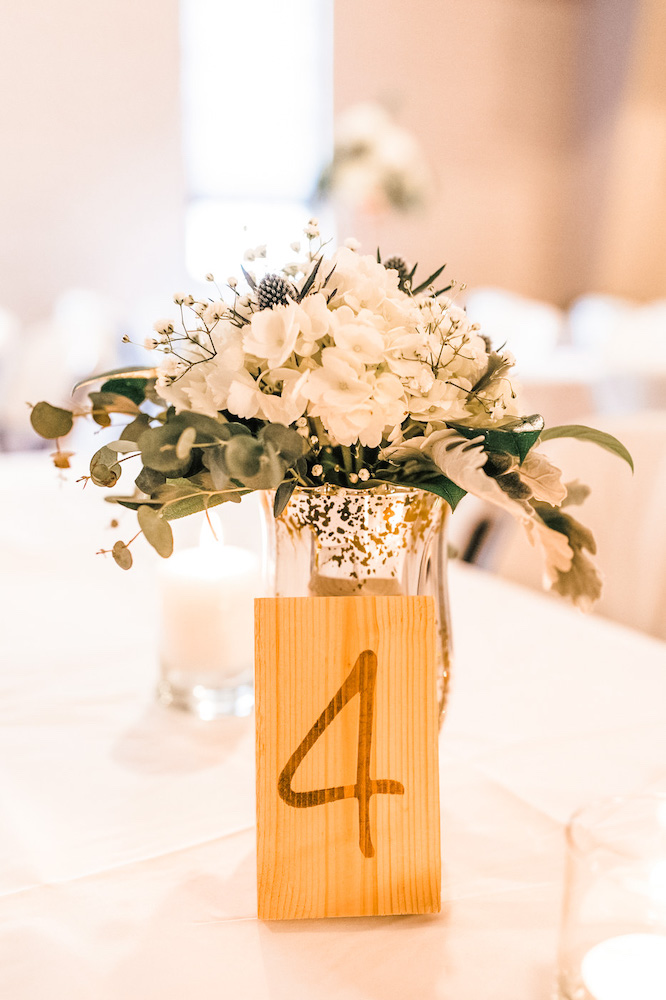
My wedding included natural colors – wooden elements, greenery, white florals, and dusty blue accents. It was definitely more simplistic than over the top.
I had floral centerpieces with candles, so I wanted to bring in a little bit of warmth with raw wood.
I decorated the reception space with the help of family and friends, but my sisters and I made most of the decor. For this reason, I didn’t need the decor to be complicated.
These table numbers were an easy enough project to add to the To Do list without becoming overwhelmed with another thing to do.
ITEMS NEEDED TO MAKE EASY WOOD TABLE NUMBERS
- 1X4 Wood Pieces
- Wood Stain
- Number Stencils
- Tape
- Old rag or T-shirt
- Saw (optional)
- Sand block
- Rubber gloves
- Polyurethane (optional)
STEPS TO MAKE EASY WOOD TABLE NUMBERS
First, cut your 1x4s into about 6″ pieces (or however long you want, making sure the numbers will fit). If you do not have a saw, the hardware store will often cut wood for free.
Sand down the edges if needed, so there are no sharp points on the ends.
Grab your stencil, using the outside of the stencil- so you will stain the number into the wood. Make sure the edge of the number is as pressed down as possible. Use tape as needed.
Once secured, use an old rag or t-shirt and put on your rubber gloves. Dip the rag into the stain, making sure it is not dripping. Gently rub the stain in the opening of the number. (If your rag is drenched when staining, you are more likely to cause bleeding in the wood, making it look like you drew outside the lines of your number.)
Let the stain dry before peeling off the stencil, so it doesn’t smudge.
Repeat for as many numbers as needed.
Finally, apply a coat of polyurethane to your table number. I can say this isn’t totally needed, but it will help to protect your wood pieces from damage.
CAN THE OUTSIDE BE STAINED & NUMBER LEFT RAW?
This was honestly my first thought, and I did try this. However, the stain kept bleeding into the number, and I didn’t seem to have as much control over it.
You could always try this method with one number to see if it works for you.
PIN IN FOR LATER

HOW TO MAKE EASY WOOD TABLE NUMBERS

Create easy wooden table table numbers to give the perfect accent to a natural centerpiece.
Materials
- 1X4 Wood Pieces
- Wood Stain
Tools
- Number stencils
- Tape
- Old rag or T-shirt
- Saw (optional)
- Sand block
- Rubber gloves
- Polyurethane
Instructions
Cut your 1x4s into about 6" pieces (or however long you want, making sure the numbers will fit). If you do not have a saw, the hardware store will often cut wood for free.
Sand down the edges if needed, so there are no sharp points on the ends.
Grab your stencil, using the outside of the stencil- so you will stain the number into the wood. Make sure the edge of the number is as pressed down as possible.
Once secured, use an old rag or t-shirt and put on your rubber gloves. Dip the rag into the stain, making sure it is not dripping. Gently rub the stain in the opening of the number.
Let the stain dry before peeling off stencil, so it doesn't smudge.
Repeat for as many numbers as needed.
Apply a coat of polyurethane to your table number. I can say this isn't totally needed, but it will help to protect your wood pieces from damage.
Notes
If your rag is drenched when staining, you are more likely to cause bleeding in the wood, making it look like you drew outside the lines of your number. Go light; you can always add more.
Leave a Reply