Here are a few tips on how to organize your coffee cart at home. Using a cart for a coffee and tea area may be just what your kitchen needs.
This post contains affiliate links, which means I make a small commission at no extra cost to you. See my full disclosure here.
Our kitchen at home doesn’t have a ton of counter space, but still a good amount for the size. With the amount of storage space we have, we keep some of the items we use on the day to day on the counter.
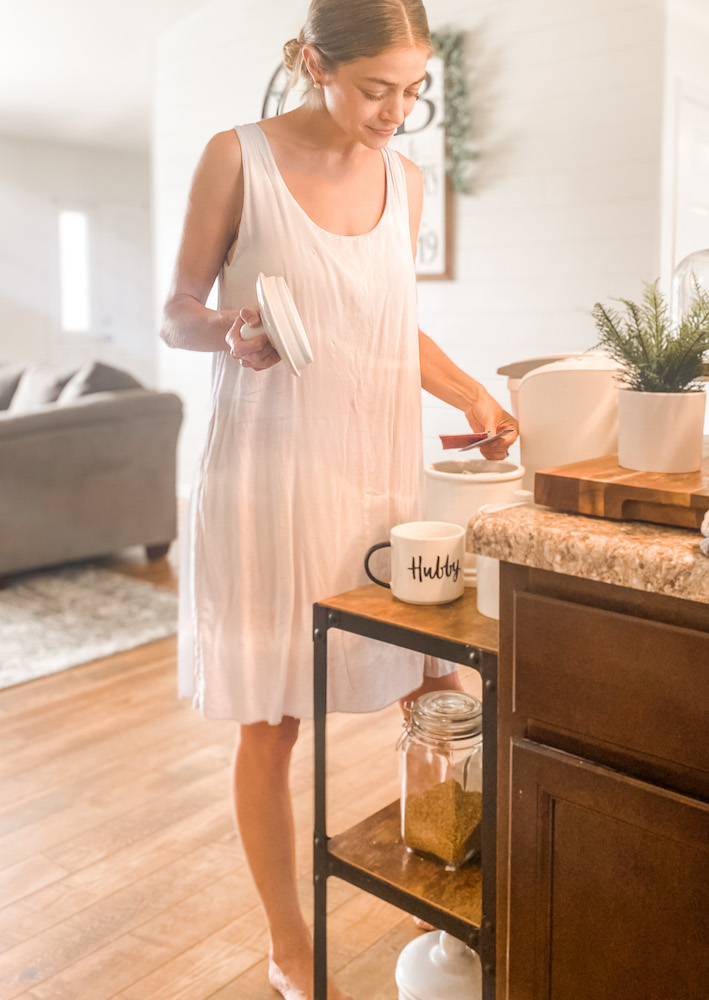
We used to have our coffee and tea set up on the end, but once Landon (our baby) was born, we needed to add a drying rack, and things started looking a little cluttered.
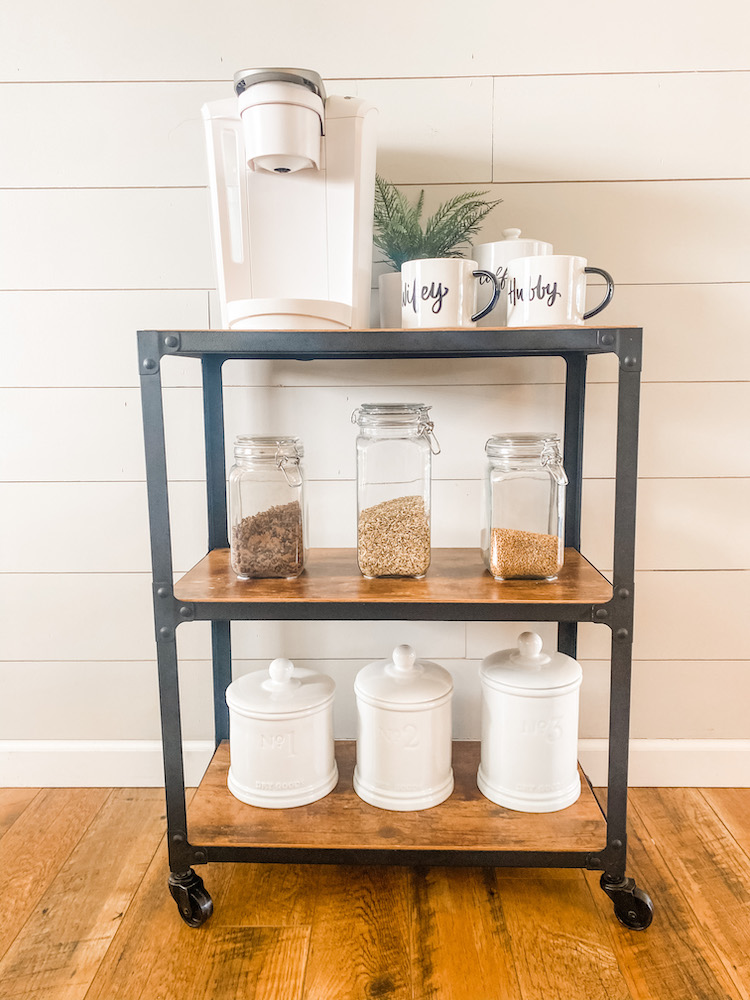
We moved our Keurig, coffees and teas, etc to a little cart off the end of our island, and it has been so great (that is after I designated containers for the items).
You can see the cart right when you walk in the front door, so as much as I wanted it to be functional, I also wanted it to look presentable.
STEPS TO ORGANIZE YOUR COFFEE CART
1. Separate What You Have
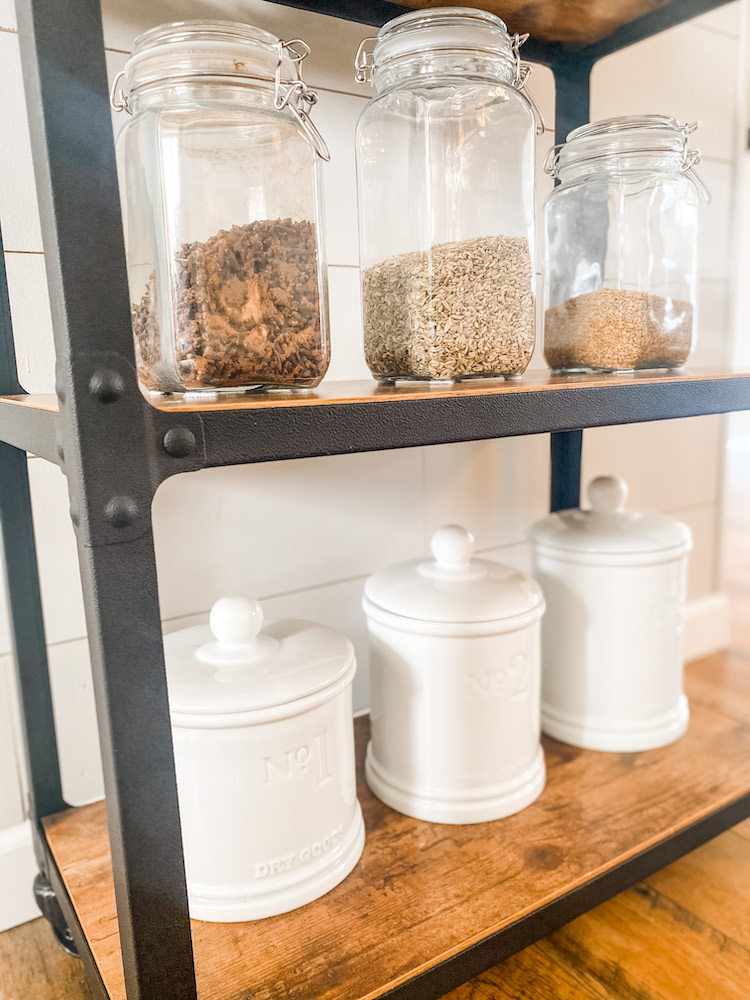
Separating what you have will help you know what containers you actually need. We had spices (fenugreek, cloves, and fennel seeds), ground coffee, k-cups, and tea packets.
2. Choose Your Containers & Organize
Use items if you already have them. If you need to buy some, look at what you just separated and see what would work best.
We already had white porcelain containers from our wedding. I also picked up glass containers from a craft store, so I could have some I could see inside of.
Once you have your containers, start adding your items. We added the ground coffee to one of the porcelain containers, tea bags to another, and a small bag of ground coffee to the third one. Spices were put in the glass containers, so they are easy to see. We were given another small container with coffee text on it, so we fit a few k cups in there, too.
3. Place Your Items
Split up your colors or solids to balance out your bar.
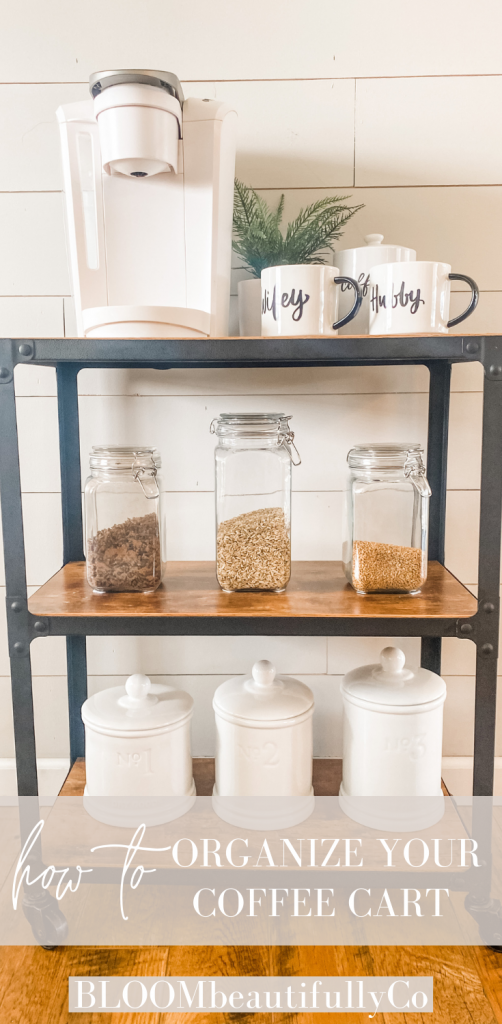
I wanted to make sure nothing looked cluttered since this cart is very visible. I placed the white containers on the bottom, glass in the middle to separate, and the Keurig on top.
To accessorize a little, you can add some mugs and greenery too! Just make sure you don’t add clutter that isn’t really needed.
Extra Tips To Organize Your Coffee Cart
Labeling
To easily identify items inside your containers, you can label each one. One way would be to use painters tape to create a rectangle, and paint the opening using chalk paint. Then, write what is inside with a chalk marker.
Baby Proofing
Our son started pulling himself up a few months ago and pulling anything down he could reach. I found velcro at home, and added a piece to the bottoms of the containers. Just make sure you add a big enough piece to make it strong.

Where Did I Get My Coffee Cart?
You can find my coffee cart on amazon here.
BLOOM beautifully
We are always thankful for you stopping by, and we hope you enjoyed this post. Keep continuing to Bloombeautifully!
Pin These Coffee Cart Tips For Later
More Tips and DIYs
Find more of our LIVEbeautifully post here.
Leave a Reply